Wednesday, December 28, 2016

“New Year’s Baby” Porchetta – Here’s to Being Happy, But Not Satisfied in 2017!

Since I’m not really working, I’ll keep this “baby porchetta” post short and sweet, and simply let you refer to the video for all the important stuff. Like how amazing this tasted; and how impossibly moist and tender it was.

Notwithstanding some overlapped bacon (which I’ll do in a single layer, in maybe a hotter oven next time), I loved how this came out! I’m not sure if it will bring you prosperity in the New Year, but this is so good, who cares?

I want to wish you all a very healthy, and bountiful, 2017! Happy New Year, and, as always, enjoy!


Ingredients for 2 large or 4 smaller portions:
1 boneless pork tenderloin roast, about 1 to 1 1/2 pounds
about 8 strips bacon or enough to wrap
For the spice rub:
1/2 teaspoon whole fennel seeds
3 cloves sliced garlic
1 tablespoon finely sliced sage leaves
2 teaspoons chopped rosemary
2 teaspoons freshly ground black pepper
1 teaspoon kosher salt, or more to taste
zest from one lemon
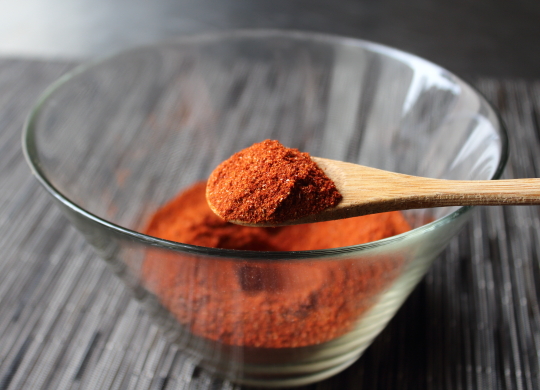
1 teaspoon red pepper flakes
1 tablespoon olive oil

- Roast at 450 F. about 25 minutes, or until 134 F. internal temp, which should get you a finished, rested temp of 140-145 F.

Friday, December 23, 2016

Oops! And, Happy Holidays!

Better late than never! Yes, this post was supposed to be done on Monday, letting you all know I was off this week for Christmas break; but apparently with all the drinking, eating, shopping, and drinking, it never got done.

So, just to make it official, I was off this week, and technically next week, since Allrecipes.com is on break until the New Year. However, I will be posting one last video for 2016, after the holiday, so stay tuned for that. In the meantime, have a wonderful holiday, and, as always, enjoy! 

.

Friday, December 16, 2016

Deviled Lobster Tails – There's Something in the Details

I never blame people for not wanting to work with fresh lobsters, but when it comes to lobster tails, there is no excuse. Well, I guess the enormous price tag is also an excuse, but other than that, no excuse. 

Speaking of price tags, since the recipe is so straightforward, I’ll spend the rest of the post ranting about pre-thawed lobster at the market. When buying your tails, ask the person working the fish department to go into the freezer, and get you ones that are still frozen. Lobster tails are always flash frozen shortly after being caught, and sent to the grocery store in this state, which is how they should be sold, except they’re not. 

What the grocery store does is thaw them, and pile them in the fish case, so you think a big batch of fresh lobster tails have just arrived from Cape Cod. They sit there for a day, or two, or three, getting less fresh and sweet by the minute. So, bypass the “fresh,” for the frozen, which are fresher. I really hope that all made sense, but regardless, with fancy dinner party season in full swing, I really do hope you give these deviled lobster tails a try soon. Enjoy!


Ingredients for 4 portions:
Please note: I never measure when I use this technique, and so these are just guesses. Everything in this is “to taste,” so work accordingly.
4 frozen lobster tails, thawed and split as shown
1/4 cup mayonnaise
pinch of salt
1 tablespoon sriracha hot sauce
1/4 teaspoon cayenne
1 teaspoon paprika
1 teaspoon lemon juice
2 tablespoons chopped tarragon, chervil, or dill

Tuesday, December 13, 2016

Béarnaise Sauce – Maybe My Favorite ‘Aise

I adore a good hollandaise, and couldn’t survive without mayonnaise, but if I had to pick an all-time favorite ’aise, it might just be béarnaise. This tarragon-spiked, shallot-infused hollandaise is absolutely perfect with any and all steaks or roasts; especially lean ones, like our recent salt-crust beef tenderloin.

A sauce made from 75% butter has some advantages, and elevating lean meat is just one of them. This is also excellent on potatoes, vegetables, as well as just about any seafood I can imagine. And as I mentioned in the video, this can be used to make quite the memorable eggs Benedict.

We’re using the same revolutionary technique here that we featured in our last hollandaise sauce video, with one small tweak. If you’re feeling lucky, try to create your hollandaise over medium heat, instead of low. That’s what I usually use, but I played it safe, and went with low heat in that recipe, even though using medium is much faster.

You’ll have to keep an eye on things, but you should get results similar to what you see in this video. By the way, just like when making regular hollandaise you can adjust the thickness by adding in a little hot water if necessary. So, whether you’re going to enjoy this with salt-crusted beef tenderloin, or something else just as special, I hope you give this béarnaise sauce a try soon. Enjoy!


For the reduction:
1 cup fresh tarragon leaves, roughly chopped
1/2 cup thinly sliced shallots
1 rounded teaspoon whole black peppercorns
1/2 cup white wine vinegar
1/2 cup white wine
1/3 cup water

For the compound butter:
1/4 cup chopped tarragon
1 teaspoon drained capers
1 tablespoon cold butter

For the béarnaise:
2 large egg yolks
3 tablespoons tarragon vinegar reduction
8 tablespoons cold unsalted butter, cubed
1 tablespoon caper tarragon compound butter
salt and cayenne pepper to taste
freshly ground black pepper, optional

Friday, December 9, 2016

Salt-Crusted Beef Tenderloin – No Lomo

I received a food wish for lomo al trapo a while back, which I learned is a Colombian method for cooking beef tenderloin. The meat is encased in salt, wrapped in a kitchen towel, and then set on top of hot coals. 

Crediting the intense heat, and salt crust, aficionados of this Colombian technique say it produces the juiciest, most flavorful beef tenderloin you’ve ever had.

It really sounded amazing, and I wanted to try it, but realized many of you would have trouble explaining why you were destroying a perfectly good kitchen towel in the process. So, I decided to try a towel-free salt crust technique I’d used successfully on prime rib before, and despite some minor aesthetic issues, it worked amazingly well.

Beef tenderloin is a lean cut of meat, which can make for a fairly boring roast, but that was not the case here. The tenderloin took on an intensely beefy flavor, and was so juicy that I thought something was wrong.  There was so much on the cutting board, I was afraid there wouldn’t be any left in the meat, but I’m happy to report every single bite was dripping with moisture.

Maybe this summer, when the grill is fired up, and I have one too many kitchen towels around, I’ll try the real lomo al trapo technique, but in the meantime I was thrilled with how this came out, and really hope you give it a try soon. Stay tuned for the béarnaise sauce video, and as always, enjoy!


Ingredients for 4 portions:
2 pound center-cut beef tenderloin roast
1 garlic clove crushed
2 teaspoons freshly ground black pepper
1 egg white
about 3 cups coarse-ground sea salt

Tuesday, December 6, 2016

Tarte Flambée – Alsatian Bacon & Onion Pizza (Not Pizza)

The hardest thing about this amazing tarte flambée recipe isn’t the prep, or finding some exotic ingredient, it’s actually trying to explain to your guests why it’s not called pizza. I’m reminded of that old saying, “If it walks like a duck, talks like a duck, and looks like a duck, sometimes it’s a trout.”

That’s right, while this is a pizza almost everywhere else, in certain places on the German/French border, it goes by the totally dessert-sounding name of tarte flambée. Just tell people the name comes from the fact it used to be cooked in a fire, and then trail off.

Once your crust is pre-browned and topped, you have several options for bringing this to a successful, and hopefully crispy conclusion. Since the bottom is already browned, I usually just broil it on high, about 8 inches from the flame, for about 5 minutes, or until the top is looking just right.

The other method would be to pop it in a 500 F. oven, for about 7-10 minutes, or until you’re completely happy. Or, you can actually do both – start in a hot oven, and then give it a minute under the broiler to seal the deal. Either way, I really hope you give this tarte flambée a try soon. Enjoy!


Ingredients for 4 tarte flambée:
4 balls prepared pizza dough (about 5 ounces each) Note: Wolfgang Puck pizza dough recipe would would perfectly
12 ounces bacon, sliced
1 large yellow onion, sliced, cooked with salt, until soft, but not caramelized
For the cheese mixture:
pinch of nutmeg
salt and freshly ground black pepper to taste
cayenne to taste

Friday, December 2, 2016

My Dream Vanilla Bean Pastry Cream

And by dream, I mean nightmare. I don’t test recipes. There is nothing in my contract that requires me to only post successful videos, and as you longtime viewers know, I do enjoy sharing the occasional flop, but this new and improved, vanilla bean pastry cream was not a one-take affair.

I’ve wanted to update our old crème patisserie recipe for a while, and long story short, I became obsessed, and ended up suffering through seven non-perfect versions before I was finally satisfied. The key to a great pastry cream is using the minimum of starch. You need enough so the cream holds a shape, but not so much it interferes with the flavor.

I found flour-based pastry creams easy to work with, but they have more of a pasty mouthfeel that gets in the way of the vanilla. That’s why this version is all corn starch, which we need less of to do the same job. Just be careful not to keep cooking it once it has thickened, otherwise you may compromise its thickening powers.

With the holidays, and their associated fancy desserts, right around the corner, what better time to work on your pastry cream game? So whether it’s for Napoleons, pies, tarts, or cakes, I really hope you give this a try soon. Enjoy!


Makes about 3 cups:
1 large whole egg
2 large egg yolks
1 teaspoon kosher salt (1/2 teaspoon fine table salt)
1/2 cup granulated white sugar
1/4 cup corn starch
2 cups whole milk
1 vanilla bean, seeded, plus pure vanilla extract if needed
Tip: Save the scraped pods, and stick them in your sugar container for lovely, vanilla-scented sugar!
4 tablespoons cold butter, cubed

Pastry Cream is Coming!

Despite a few minor and uninteresting technical difficulties, the pastry cream video will be posted tonight! Stay tuned!

Tuesday, November 29, 2016

“Mille Feuille” (Napoleon) – Short and Sweet

This mille feuille, which I’m sure I pronounced perfectly in the video, is also referred to as a Napoleon, and is the easiest, “fancy” pastry I know. The technique for creating your “thousand leaves” is very simple, especially if you use frozen dough, which any sensible person should do.

Whether you use frozen or homemade dough, the key is to keep it flat. We do this by “docking” the dough, and pressing with another pan. I used a few layers of foil before placing the pan on top, to make sure it was in contact with the dough, and depending on the size and shape of your pans, you may need to do the same.

Most patisseriers will make these well ahead, and keep them in the fridge, so that the pastry softens a bit, as it absorbs moisture from the filling. This is standard procedure, and they are much easier to eat that way, but I actually prefer to enjoy them right away, so as to fully experience the contrast between the crispy, buttery pastry, and the cold, creamy custard. 

Stay tuned for the new and improved pastry cream video heading your way soon. In the meantime, your favorite recipe should work, as well as things like whipped cream, sweetened ricotta/mascarpone, and/or lemon curd. I really hope you give this a try soon. Enjoy!


-- Bake at 400 F. for about 15 minutes “pressed,” and then continue for another 10-15 minutes, uncovered, or until browned and crisp. I turned mine once during that time.

-- To make the icing, simply add enough water or milk to powdered sugar, until the right consistency is reached. For the chocolate one, I started with one part unsweetened cocoa to four parts powdered sugar, and then stirred in the liquid. Check this video if you are confused.

Tuesday, November 22, 2016

Candied Yams – So Good You’ll Forget You’re Eating Sweet Potatoes

While it’s true the “yams” used in this gorgeous candied yams recipe are really just orange-fleshed sweet potatoes, it’s also true that no one cares, “yams” sounds better, and takes less characters to share on Twitter. Like I said in the video, I only mentioned it in case “that guy” is at your Thanksgiving.

I’m not a huge sweet side dish person, but I do make an exception for these candied yams, since it’s, well, exceptional. Part of that, I believe, is using lemon instead of orange juice, since we have plenty of sweetness, and what we really need is some tartness for balance.

Speaking of sweetness, I like to use a Grade B maple syrup, since it seems to have a little deeper maple flavor; or at least that’s what Alton Brown said once, and I believed him. Having said that, any real maple syrup will be just fine.

This will be our last video before the Thanksgiving holiday, and I’ll be taking the next few days off, so just a heads-up that I won’t be around to answer questions on the blog. I’m sure you’ll be fine. Anyway, I want to wish you all a very healthy, and happy holiday, and I really do hope you give this a try soon. Enjoy!


Ingredients for 8 portions:
For the yams:
3 pounds yams, peeled, cut in 2-inch pieces,
2 quarts cold water
3 tablespoons kosher salt (or about 5 teaspoons of fine salt)
For the glaze:
4 tablespoon unsalted butter
1 cup brown sugar
1/4 cup maple syrup
1/2 cup freshly squeezed lemon juice
1/2 teaspoon ground ginger
1/4 teaspoon cinnamon
pinch cayenne
salt to taste
chopped pecans, walnuts or pistachios for garnish

Friday, November 18, 2016

Creamy Corn Pudding – Perfect for Holidays, Weekdays, and Weekday Holidays

Corn pudding doesn’t get the same attention as some other holiday side dishes, but it’s a real crowd-pleaser that pairs perfect with all your favorite special occasion meats. 

It also looks, and tastes like you have to be a good cook to make, which happily you don’t. If you have a decent blender, or food processor, there isn’t much that can go wrong.

If you are sans mechanical pureeing device, you can still make this by using the corn kernels whole. In fact, many corn pudding makers will leave some portion whole for texture, but as I said in the video, I like the smooth version best. 

The pan under the baking dish is optional, and if you’re in a hurry, you can skip it, which will cut about 15 to 30 minutes off your cooking time; but I like that it slows the cooking, which I think improves the texture. You can do the same thing with a water bath, but that’s slightly more work, and this really isn’t that temperamental of a recipe.

Speaking of cooking time, I used an 8” x 11” baking dish, which is kind of an odd size, so if you use the more common 9” x 12” casserole, you’ll have to test for doneness, as the batter will probably cook faster. Either way, if you’re looking for a special holiday side dish, or just something delicious to throw next to sausage on a Tuesday night, I really hope you give this a try soon. Enjoy!


Ingredients for a 12 portions:
2 pounds frozen yellow corn (buy premium quality)
3 tablespoons maple syrup
6 large eggs
1/2 cup milk
3 teaspoons kosher salt (1 1/2 teaspoon fine salt)
1/4 teaspoon cayenne
1/4 cup all-purpose flour
1 teaspoon baking powder
1/2 cup melted butter, divided (2/3 for batter, 1/3 for baking dish)
1 1/2 cups heavy cream

- Place baking dish on a sheet pan and bake at 350 F. for between 60 and 75 minutes, or until brown and just set. You may need to adjust for different size/shape baking dishes.  

Tuesday, November 8, 2016

Chef John is on Vacation

Just wanted to let everyone know I’ll be on vacation until the middle of next week, and no, it’s not because I’m moving to Canada. Not sure how this rumor got started, but it's not true, and besides, California is way more of a foreign country than Canada will ever be.

Anyway, I'm looking forward to a nice, relaxing break, and suggest you use this time to catch up on all the videos you’ve missed. We have lots. Thank you, and we’ll see you next week!

Friday, November 4, 2016

Potato Leek Soup (aka Vichyssoise) – The Perfect Autumn in San Francisco Soup

This can be a strange time of year for weather in San Francisco. Our climate can suddenly swing from hot and humid, to cold and wet; which makes this potato leek soup a very valuable addition to the recipe repertoire. 

There is nothing better on a chilly, damp day than a steaming bowl of this; and conversely, few things are as delicious, and refreshing on a hot, sweaty day than a bowl of ice cold vichyssoise. As long as you cook the leeks long enough, you can’t go wrong either way.

Since the amounts of leeks and potatoes in yours may not be exactly the same as mine, be prepared to adjust the amount of stock in this recipe. It's always easier to add than reduce, so as long as your potatoes are covered, I’d play it by ear until it’s blended, and go from there. So, no matter what the weather, I hope you give this a try soon. Enjoy!


Ingredients for 6 portions:
1 1/2 pound leeks (about 4 or 5)
4 tablespoons unsalted butter
2 teaspoons kosher salt, plus more to taste
1 1/4 pound Yukon gold potatoes
3 to 4 cups chicken broth/vegetable stock, or as needed to adjust the thickness
1 cup heavy cream
1/2 cup crème fraiche, plus more to garnish (click here for recipe video)
pinch of cayenne pepper
sliced fresh chives for garnish

Tuesday, November 1, 2016

Pork Osso Buco – Keeping it Real without Veal

I’ve never shared the same love for veal osso buco that most of my fellow Italian food fans profess, and it’s been the source of a fair amount of introspection. Was there something wrong with me? It’s a sticky, succulent shank, braised until fork tender; what’s not to like? Then I made it with pork, and figured it out.

It comes out too good with the veal shank. Because of their massive quantities of connective tissue, the sauce veal shanks produce is rich, sticky, and sweet; which I personally find overpowering. It’s great for a few bites, but then I’m over it, quickly. On the other hand, pork shank isn’t quite as rich, and gelatinous, and I personally enjoy it much better.  

For some of the same reasons, I don’t generally reduce the sauce too much. It’s not supposed to be a very thick sauce, and I’m generally happy to get to the coats-the-back-of-a-spoon stage. Anyway, whether you use veal or pork, I hope you give this a try soon. Enjoy!


Ingredients for 6 portions:
six thick-cut pork shank sections
salt and freshly ground black pepper to taste
1 tablespoon olive oil
1 tablespoon butter
1 large yellow onion, diced
1 large carrot, diced
2 ribs celery, diced
1/4 cup tomato paste
2 tablespoons all-purpose flour
1 cup white wine
2 cups chicken broth
1 bay leaf
1/8 teaspoon ground clove, or *one whole clove
1/2 teaspoon dried thyme
1/2 teaspoon dried Rosemary
freshly chopped Italian parsley and freshly grated lemon zest for the tops

* if using whole clove, tie in some cheese cloth, along with the bay leaf and other herbs to create a “bouquet garni.”

Saturday, October 29, 2016

How to Make Fancy Crackers – Also Know as Crispy Rosemary Sea Salt Flatbreads

Making your own “fancy” crackers at home is a fairly basic operation, and not only will they be less expensive, but you can customize them anyway you want. Whether those reasons are good enough is for you to decide, but if they are, your efforts will be rewarded… with crackers just as good as the ones from the store.

As I mentioned in the video, there are two types of “crackers;” the crispy, delicate, flaky, biscuit-style; and the flatbread-style we’re making here. These are much more like a fried pita chip, than a saltine, which is perfect for pairing with cheese. There’s nothing worse than trying to cheese a too-brittle cracker, three drinks in, and having it explode in your hand.

The recipe and technique are very simple, but please pay attention to your baking time. My “12-15 minutes,” is just a rough guess, and it will depend on the thickness of your dough. I would start checking at 10 minutes, and go from there. Other than that, not much can go wrong. With prime cheese and cracker season upon us, I really hope you give these a try soon. Enjoy!


Ingredients for about 48-60 crackers, depending on the size
1 1/2 cups all-purpose flour
1 teaspoon sugar
1 1/2 teaspoon kosher salt
3 tablespoons extra-virgin olive oil
1/2 cup cold water
1/2 cup freshly grated Parmigiano-Reggiano
1 tablespoon minced fresh rosemary

- Bake at 400 F. for 12-15 minutes, or until browned and crisp.

Tuesday, October 25, 2016

Roman-Style Gnocchi – No Potatoes Were Harmed During the Making of This Video

Gnocchi alla Romana are as delicious, as they are virtually unknown. I feel like I’ve eaten a fair amount of Italian food, and I’ve been to Rome, but it wasn’t until late in life that I discovered these wonderful, baked semolina dumplings.

Above and beyond their exquisite texture, and great taste, I love their versatility. They’re a world-class side dish as is, but can be paired with your favorite pasta sauce, and served as an appetizer, or entrée. Rave reviews should come your way; along with lots of “But, why are these called gnocchi, again?”

For a great winter twist, you can place some sage leaves in between the gnocchi before baking them, and they’d be perfect at any holiday feast. In fact, now I’m upset I didn’t do that this time. I’m going to have to make another batch. Anyway, I really do hope you give these a try soon. Enjoy!


Ingredients for about 16 Roman-Style Gnocchi:
Note: I used a 2.75-inch cutter
3 cups milk
1 teaspoon kosher salt, or to taste
1 1/4 cup semolina
1 cup freshly grated Parmigiano-Reggiano cheese (only about 1.25 ounces by weight, but if you grate it on a microplane, it will easily fill a cup)
2 large egg yolks
3 tablespoons cold unsalted butter, cut into small cubes
3 tablespoons melted butter for the top
more grated Parmigiano-Reggiano for the top

Friday, October 21, 2016

Chicken, Sausage, Peppers, and Potatoes – Name That Dish!

It’s kind of nice when the name of a recipe is simply what’s in it, as is the case with this pan of roasted chicken, sausage, peppers, and potatoes. As soon as you see the words, you know exactly what you’re getting into. 

The only problem is, “chicken, sausage, peppers, and potatoes,” uses up a lot of characters on Twitter, so if you did have an idea for a shorter and/or catchier name, I’m all ears.

By the way, the two most important things here are not on the ingredient list. That would include a large, heavy-duty roasting pan, as well as a very hot oven. Hopefully, you have something similar to what I used, but if not, you can divide everything up between several smaller casserole dishes; or even use those large, disposable aluminum pans.

I went with hot Italian sausage here, since it so highly-seasoned, but you can really tailor a dish like this to your personal tastes, by switching up what you use, as well as the herbs, and seasonings. No matter what you include, just be sure to season generously, and leave it in the oven long enough. We want everything beautifully caramelized, and our chicken fork tender. I really hope you give this a try soon. Enjoy!


Ingredients for 6 portions:
4 large Italian sausage links
1 tablespoon olive oil, plus more as needed
6 to 8 bone-in, skin-on chicken thighs
2 teaspoons kosher salt, plus more as needed
freshly ground black pepper to taste
2 large handfuls, seeded and cut sweet peppers
1 sliced small red onion
1/2 sliced yellow onion
4 large Yukon Gold potatoes, quartered
2 generous teaspoons dried Italian herbs (I actually used an “Herb de Provence” herb blend, which included rosemary, thyme, oregano, marjoram, basil, parsley, and lavender)
fresh Italian parsley to garnish, optional

Tuesday, October 18, 2016

Pumpkin Spice Snickerdoodles – Better Than Certain Coffees and Beers

This is a very unlikely post, considering the fact I’m not a big fan of snickerdoodles, and generally loathe adding pumpkin spice to non-pie things, such as coffee and beer. Despite that, I had a feeling the pumpkin spice would work perfectly with the buttery, cinnamon sugar cookie, and it did.

Unfortunately, a quick Google search showed I hadn’t invented it, and there were thousands of variations; from thin and chewy, featuring crisp edges, to much taller, pillowy versions. I decided to go thin, and adapted this snicker doodle recipe, from Averie Cooks.

One common denominator was the use of baking soda, plus cream of tartar, instead of baking powder. Since that’s pretty much what baking powder is, I don’t see what the big difference would be either way, but I thought I would mention in case you refuse to go out and buy cream of tartar. Either way, I really hope you give these a try soon. Enjoy! 


Ingredients for about 18-20 Pumpkin Spice Snickerdoodles:
1 1/2 cups all-purpose flour (6 1/2 ounces by weight)
1/2 teaspoon baking soda
1/4 teaspoon cream of tartar
1/2 teaspoon kosher salt (1/4 teaspoon fine salt)
1/2 teaspoon cinnamon
1/2 teaspoon ginger 
1/4 teaspoon allspice
1/4 teaspoon clove
1/8 teaspoon nutmeg
1/2 cup unsalted butter, room temp
1/2 cup granulated sugar
1/3 cup light brown sugar, packed
1 teaspoon vanilla extract
1 large egg

For the rolling sugar:
1/4 cup white sugar
2 teaspoons cinnamon
*plus a few extra pinches of the pumpkin spices, if so desired

For the icing:
1/4 cup powdered  sugar
stir in enough milk, lemon juice, or other liquid to achieve brushing consistency

Friday, October 14, 2016

How to Make Berbere Spice and What to Do with It (Partial List)

I love berbere spice, but it never occurred to me to make my own. I usually get it pre-mixed from the fancy grocery store, and it’s never disappointed, but I’ve wanted to feature it in a recipe, so I figured I’d also show how to make a batch from scratch.

Well, sort of from scratch. To make this “for real,” you need to buy the whole spice seeds/pods, toast them, and grind it yourself. It does make a difference, but I rationalize not doing all that extra work because I usually toast the spices during the cooking process anyway.

I’m not exactly sure what dried chili pepper(s) would be most authentic, but many people are saying that the New Mexico chili I used does a nice job. They have a nice, sweet, earthy flavor, and are sort of medium spicy. If you can’t find it, they say California or ancho chilies can work.

Like I said in the video, please use the ingredients and amounts below as an outline, and adjust this to your tastes. Once you’ve perfected your formula, you’ll be the proud owner of one of the most delicious, and versitle spice mixes ever. I hope you give this a try soon. Enjoy!


Ingredients (everything can/should be adjusted to taste):
1/2 cup ground dried New Mexico chiles
1/4 cup paprika
1 generous tablespoon cayenne
1 teaspoon onion powder
1/2 teaspoon garlic powder
1 teaspoon ground ginger
1 teaspoon cumin
1 teaspoon ground coriander
1 teaspoon ground cardamom
1 teaspoon fenugreek
1/2 teaspoon ground cinnamon
1/4 teaspoon ground nutmeg
1/2 teaspoon ground allspice
1/2 teaspoon ground cloves

For the chicken:
1 boneless skinless chicken breast, seasoned with salt and berbere spice to taste
2 teaspoon melted butter
1 lime, juiced
2 teaspoon tomato paste
1/4 chicken broth, or as needed
1/3 cup coconut milk
1/2 tsp berbere spice
salt to taste
1 tablespoon chopped cilantro